
Do I have to sand or is there some magic I’m not aware of?
You must log in or register to comment.
All plastic can be sanded and polished. Generally, you can follow an autobody like polishing regime. Something like 3M Imperial Wet/Dry 600, 800, 1000, 1500, 2000, 2500, then 3M Perfect-It 2 with a heavy cut pad, depending on the color and material, you may need a soft cut pad and light polish.
In practice, you might be able to skip 800 or 1000, and maybe 2000, but it really depends on the material properties. You will have a hard time finding an equivalent to Perfect-It 2 outside of an automotive paint supply shop. Stuff available in the consumer space to total crap. You really need power tools like a buffer with very fine speed controls to polish correctly. The pad does the work, the compound is more like a lube and cooling agent. It does some work, but most is the pad. The critical thing is knowing how to wet the pad and manage the temperatures so you don’t overhead and burn the job. Automotive clear coats are a two part catalyzed polyurethane. Overheating a printed part and clear coat is nearly the same effect. I haven’t done UV resin specifically, but I have messed with a lot of similar media, and was a painter and owner of a small body shop for around 6 years. I have polished every type of common FDM material except nylon and TPU. If you are not able to get a decent heavy cut pad and polish, just use an old crew sock with a somewhat course texture and toothpaste. Toothpaste has a fairly consistent heavy cut grit. It won’t work as well or reach the same final gloss, but it will beat any polish you can buy in an auto parts or big box store.
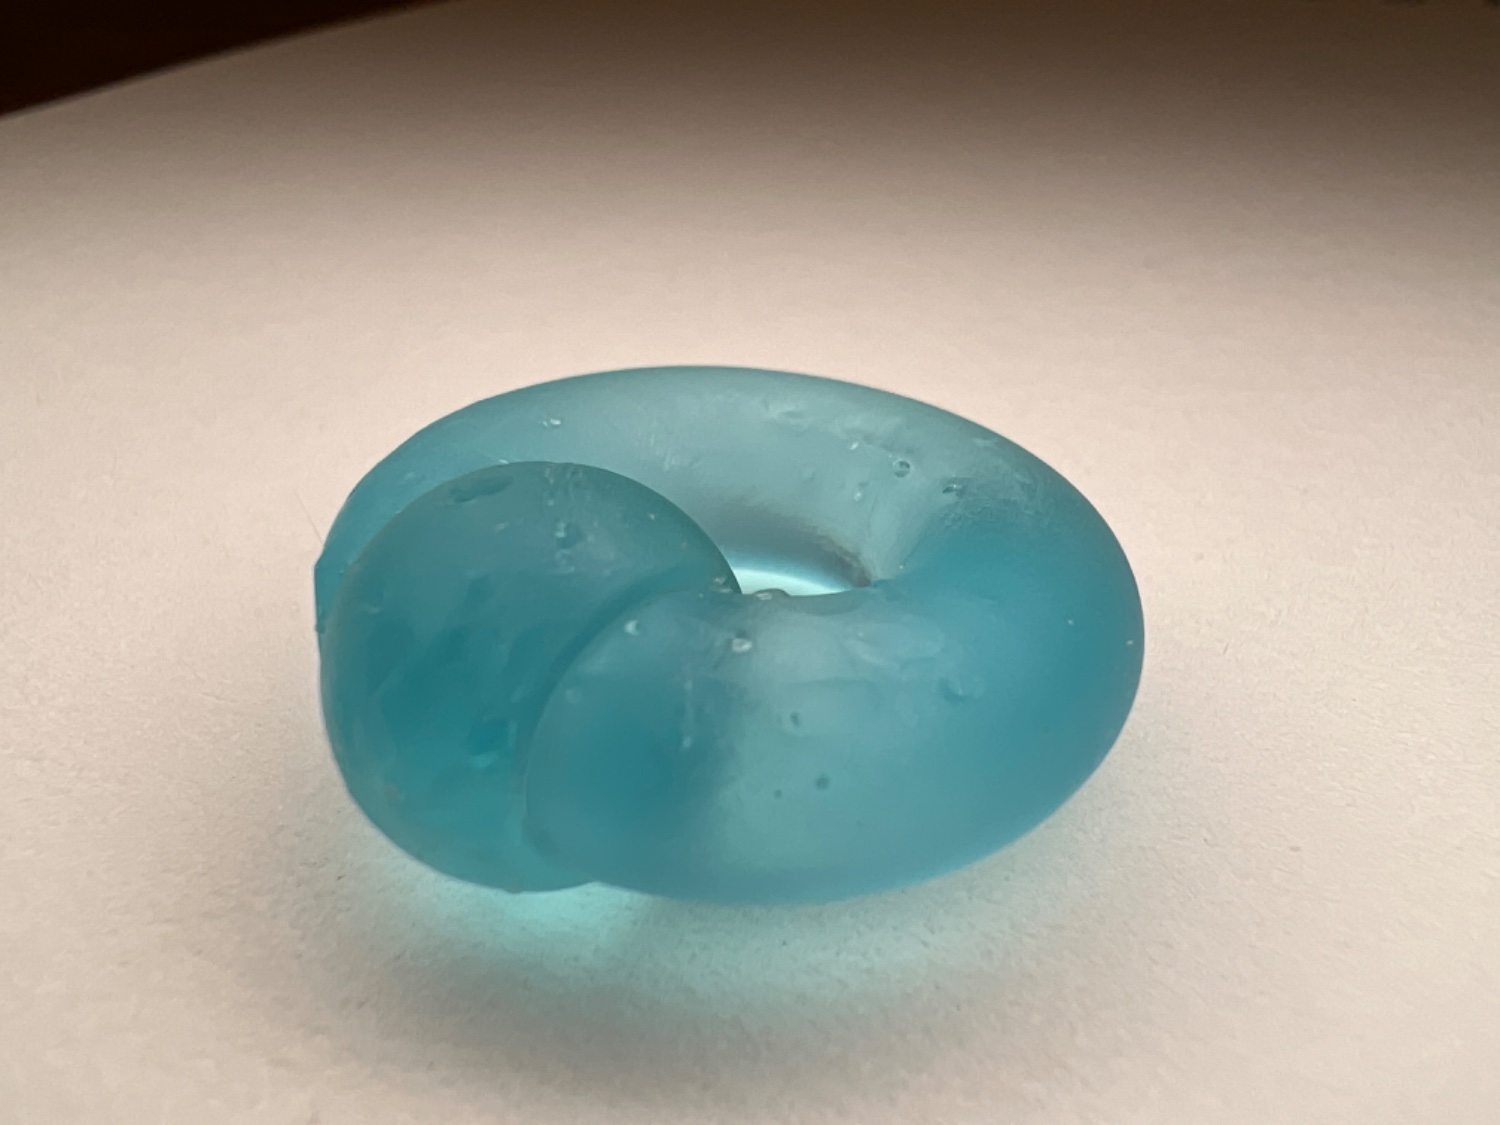
Appreciate that detailed explanation. I probably should have put something in the picture for scale. This is about 2.5cm in diameter. Not sure I could get a buffing tool small enough to be useful.
A Dremel or other rotary tool with the right attachment could definitely be used for buffing something that small.
where I work, we ocassionally put stuff like this in a vibratory tumbler for post processing. it’s finicky to get all the parameters just right from one material to the next, but when it works it’s AMAZING.
I’ve thought about attaching a jar to my drill and turning the part in some kind of medium.
What kind of parameters need adjusting for your process?
doing that is going to create a rotary tumbler. i think for this specific object that might work totally fine, but it might be too rough for anything with fine details or sharp angles. vibratory tumblers are more likely to keep the object’s overall geometry intact, whereas rotary ones will eventually sand things into kind of an ovoid shape?
as for parameters, the main ones are which grit levels for each stage, how long to run it for each stage, which tumbling medium to use, and how much water. i haven’t really ironed out any general guidelines but in my experience (perhaps obviously) most plastics don’t need nearly as long as most minerals.
it doesn’t seem like many people have gone this route yet, so if it works out, please post about your process!
I just looked in to a vibratory tumbler, they aren’t cheap!
If you’re in the US you could try the harbor freight route. They’re still not super cheap, but this will let you feel out whether or not you’ll get enough use out of one to justify buying a “nicer” one of/when the harbor freight unit breaks.
You’re not wrong… 😅
I am fortunate enough to work somewhere that has one, although we also make it available to the public!
@CaptainFlintlockFinn are those resin support marks? If so you could try reorienting your model to reduce the number of supports needed. Possibly experimenting with the number, spacing and thickness may get better results. I’m no expert but have found it helps sometimes.
They are indeed support marks. I’ve already messed with orientation and this is the position with the least marks so far. I haven’t really messed with support settings yet. Thanks for the idea.
As a consummate resin printer, a couple points: those support blemishes are a result of penetration depth and can be rectified by dialing that setting back while offsetting its load with additional, smaller supports. Furthermore, the photo indicates your object’s angle during printing is not the correct arctan, and I highly suggest you look into calibrating that accordingly. Lastly, and this is not to be shrugged off lightly: assuming the object is a prototype piercing adornment, please do your due diligence and research the physiological dangers of prolonged skin contact with not only MSLA resin but any/all varnishes, etc. you use in post-processing, as well. This is no joke; they can often be incredibly damaging with irreparable life-long effects.
Thanks!
Everything I found said that cured resin is inert. I did see that there are biocompatible resins out there but they seem to be mostly used in dental applications. I’ll keep searching though.
IIRC, cured resin is not as toxic as uncured, but it is in no way “inert”. Piercing locations are typically soft tissue, and therefore more susceptible to contact issues. Please, be safe, and if you’re selling these: ensure your clients are, too. To put this in perspective: would you feel as confident in this “inert” state were you printing binkies for infants?
10-4. I hear you.
For labs sells a biocompatible resin for medical use. I’ll probably end up switching to that.
@Piecemakers3Dprints @CaptainFlintlockFinn as a one time chemist I’d agree that there is a real possibility some trace materials in the resin causing some harm in prolonged contact. The resin may be set but could potentially leach some of the other materials such as unreacted ingredients, catalysts etc. In the same way that cheap jewellery can release alloying metals that cause irritation. A dermatologically safe varnish seems a sensible call.
Here is an alternative Piped link(s): https://piped.video/watch?v=-pbi6CkZxgA
Piped is a privacy-respecting open-source alternative frontend to YouTube.
I’m open-source, check me out at GitHub.
Right so I love resin stuff and despise sanding so I’ve tried a lot of things. First, sanding is actually great. Miserable process, but once you have a single piece that you like, it’s pretty trivial to mold and cast it again and again and again. Does take some equipment though for quality, repeatable results.
If you go with sanding, grab some micro mesh pads. They’re great.
What material is that?
Elegoo clear blue ABS like resin.
Some kind of resin
Right, not my area
Me neither, when it comes to printing. I do a lot of casting in resin though. But don’t know shit when it comes to printing with it. FDM is my pride and joy there.
part of me wants a resin printer. but i have dogs and im a bit messy. i wouldnt want them to get poisoned or something from it. theyre smart enough to not eat hard plastic, but a puddle of goo can be interesting to a dog.
Clear nail polish, dip it in and let it dry.
I don’t have a resin printer? But I read somewhere that you can use a crush and apply. Thin coat of resin over your part then cure it and it gives a shiny finish to your part and since it’s the same material, it’s won’t peel off
You could try a rock tumbler, but I have no clue how well it would work with resin.


